Items Tab
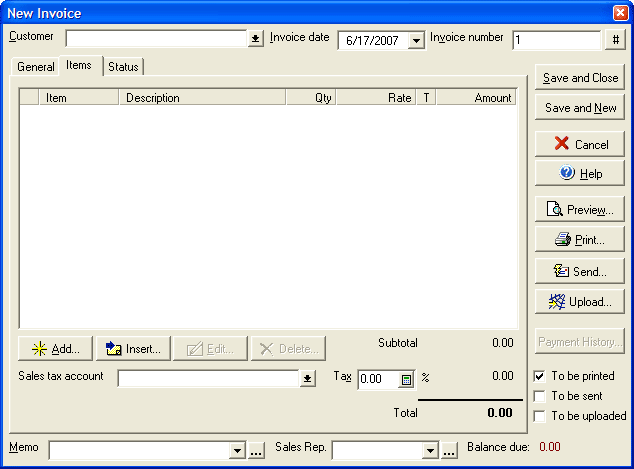
- Select a Customer name from the drop down list of names from your payor/payee list or type in a new name.
- Enter the Invoice date as you want it to appear on the final invoice.
- Enter a number for the invoice in the Invoice number field. (Subsequent invoices will increase by one digit automatically, unless you enter a new number.)
- Click the Add button to put additional invoice items on the list.
- Click on an existing item and click Edit to make changes to that item or click Delete to remove it.
- Use the Tax pull down menu to set the tax percentage to be applied to the invoice total (as applies to items marked as taxable in the Invoice Item list.)
Use the General tab to add shipping, billing, and general information to the invoice. Once you have finished entering information click Save and Done to save the invoice and close the dialog box or select Save and New to save the current invoice and then start a new invoice. You can preview how the invoice will appear upon print out by selecting the Preview button, or you can print the invoice directly by selecting print. To view any available payment history for the current invoice, select the Payment History button; this will show any customer payments made to this invoice transaction. Click the Send Invoice button to open the Send Invoice wizard. By clicking the Verify Shipping Address button, you can verify the street address of the shipping destination.