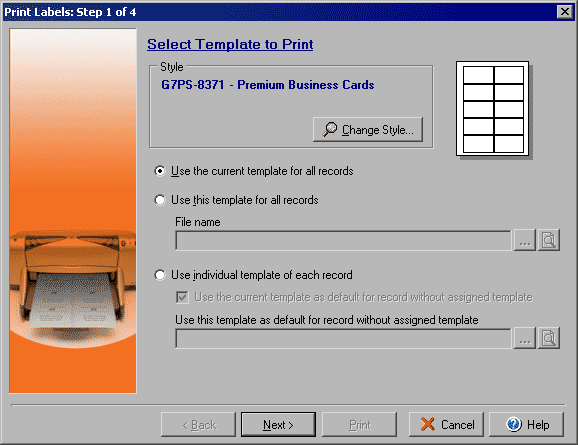
Step 1 of 4
Once you are ready to print your project, the Print Labels wizard allows you to
set up what data source to print your cards or labels from, which records to use and how to apply
the print job. From the main File menu select Print...

The first step of printing our your cards or labels is determining which style and template to
print for the records you will select in steps 2 and 3. If you wish to change the selected Style,
for example from a business card to a mailing label, you may click the Change Style button to
open the Select Style window and select a new style. Step 1 of the Print
Labels wizard offers you 3 choices for what template to use for printing your data.
- Use current template for all records: This option prints the data from all the records you
select using the layout currently open in the main design window, regardless of any default
templates set for each record (see below).
- Use this template for all records: This option prints the data from all the records you select
using the template you select by typing in a File Name or browsing to the file, regardless
of any default templates set for each record (see below).
- Use individual template of each record: This option uses the default template
 you have set for a particular record using the Templates tab of
the Contact Information window for any records that have a default template set. You must
also select a general template to use for printing any contacts that do not have a default
template set up for the particular style of label or card you are printing by checking the
Use the current template as default box or by entering the file name of the template you wish
to use as the back up.
Click Next to continue on to Step 2 of the Print Labels wizard.
