Checkbook Setup
(Step 6 of 6)
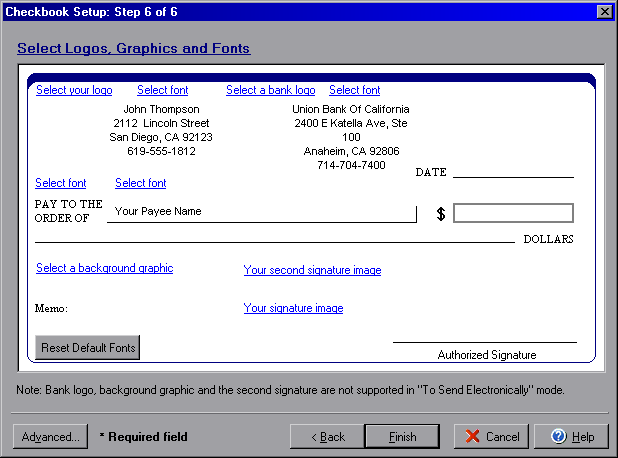
The final step of the Checkbook Setup wizard is to select any logos, background
graphics, and signature graphics you wish to use on your checks. To open the
Checkbook setup wizard from the My Accounts screen
select the Edit Checkbook icon, or from the Transactions
or Write Checks screens select the Account button and
Edit Checkbook option.

Simply click the link for whichever type of graphic or logo you wish to add to the check face. Once you select the image file that you wish to use for a graphic or logo, it will appear in the Select Image dialog box. Simply click the OK button to accept the choice or the clear button to start over with a different graphic file. By clicking on the Select font links you can customize the font for user or bank address, payee name or other check text. By clicking the Reset Default Fonts button you can reset all of the check fonts back to the default setting for the particular check style that you selected in step 2 of the Checkbook Setup.
If you need to change a graphic from one that you have already set, click the link and when the Select Image box appears click Clear to remove the graphic.
By clicking on the Advanced button you can access the dialog box for the Advanced General and Deposit Slip setup.
Back to Step 5 of Checkbook Setup.