Checkbook Setup
(Step 5 of 6)
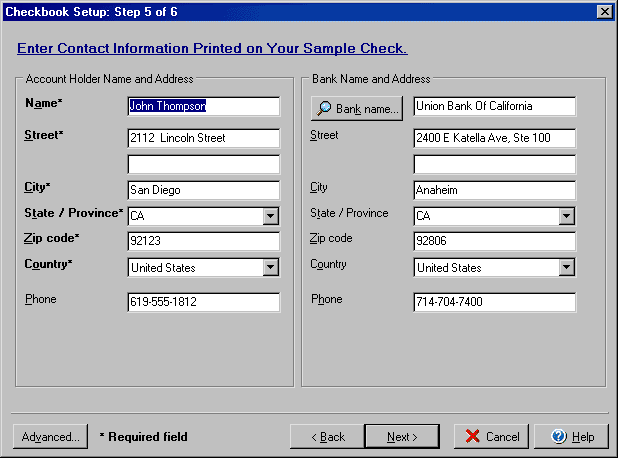
Step 5 of the Checkbook Setup wizard allows you to enter the Account holder's
name and address as well as the Bank name and address that will appear on checks.
To open the Checkbook setup wizard from the My Accounts
screen select the Edit Checkbook icon, or from the Transactions
or Write Checks screens select the Account button and
Edit Checkbook option.

By clicking on the Advanced button you can access the dialog box for the Advanced General and Deposit Slip setup.