|
Accounts in Smart Invoice The Accounts you create in Smart Invoice are the basis for creating and managing everything from invoices and customer statements to keeping track of sales tax generated. You may create as many different accounts as you need, and can edit and update accounts as necessary. For the purpose of this tutorial you will create one invoicing account. The steps for creating accounts are the same for each type of account.  Open the Create New Account Wizard
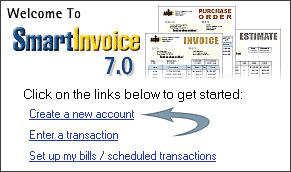
The first step in creating a new account is to open the New Account Wizard. From the Getting Started screen you can click the first link for Create a new account in the list of Quick Start links to open the New Account Wizard. You can also use the main File menu and select File > New > Account... to launch the wizard, or you may click the New Icon from the My Accounts screen. |
|
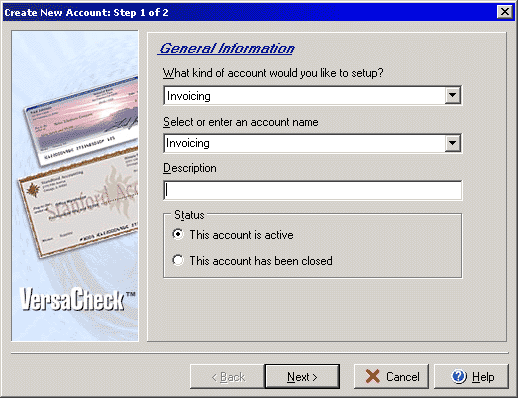
The first step of the Create New Account Wizard will ask you for
the type of the account, the account name, a brief description for
the account and what the current status of the account is.
|
|
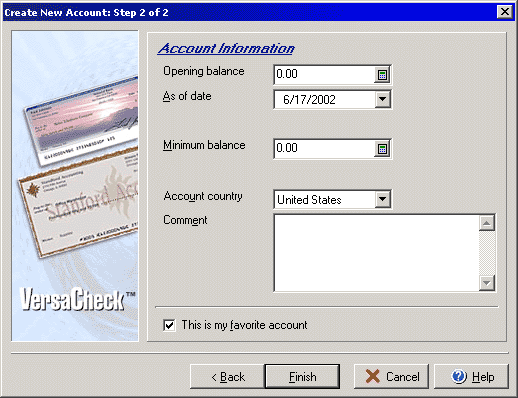
Step 2 of 2 The second step of the Create New Account Wizard will ask you to
set the opening balance, the date from which the account will be
tracked, a minimum balance ammount, the account country, comments,
and the favorite account status.
|
You have now successfully set up your first account! You can repeat the steps above to set up as many accounts as you will need, including accounts for bank accounts, cash, etc. The next step is to start setting up your Address Book.
Related Help Files
Create Account Wizard - Step 1
Create Account Wizard - Step 2
My Accounts Screen
Getting Started Screen

