Step 5 of 5
The Checkbook Information Wizard walks you through setting up your checkbook. From the My Accounts screen click Edit Checkbook or from the Write Checks screen and click Account and select Edit Checkbook.

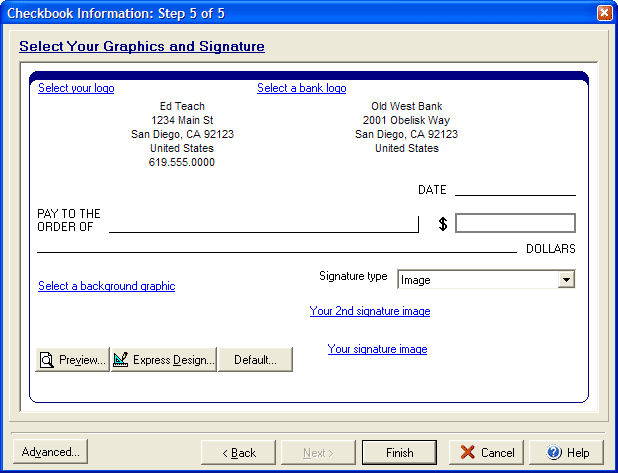
Step 5 will allow you to select the logos, background images and a signature type for your check. Click on the link for Select your logo to add a personal logo or click Select a bank logo to add your banks logo next to the bank address. If you wish to add an image for the background of your check click the Select a background graphic and then browse your computers files to find the graphic you wish to use. In the Signature type drop down menu you can select to use one of four types of signature:
- Blank: Leaves the signature line blank for the check writer to sign by hand.
- Image: Inserts a digitized signature or graphic for the signature.
- Text: Inserts standard check draft text stating that a signature is not required.
- CheckScape: Inserts a CheckScape barcode for the signature.
You can view the check by selecting the Preview button or you can edit the check face by selecting the Design button to open the check designer. Clicking the Default button will return all settings to the original settings.
Click Back to return to Step 4 or Finish to complete the setup.Clicking the Advanced button will allow setting up special encoding if needed.