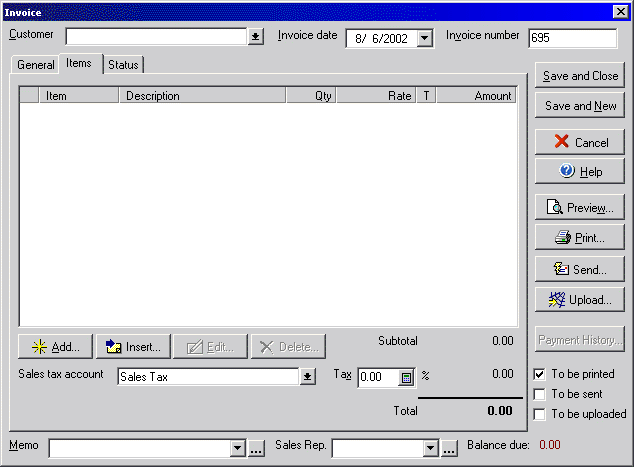
Invoice
(Items Tab)
New invoices can be created or existing invoices may be edited by selecting
the New Invoice option from the Business menu or highlighting an existing invoice
in the Account Transactions screen and clicking Edit.
Use the General tab to add shipping, billing, and general information to the invoice or click the Status tab to view details about the invoice history. Once you have finished entering information click Save and Done to save the invoice and close the dialog box or select Save and New to save the current invoice and then start a new invoice. You can preview how the invoice will appear upon print out by selecting the Preview button, or you can print the invoice directly by selecting print. To view any available payment history for the current invoice, select the Payment History button; this will show any customer payments made to this invoice transaction. You may print, e-mail, or upload to Qchex the invoice by checking one of the 3 corresponding check boxes.