VersaCheck® Active Check Server™
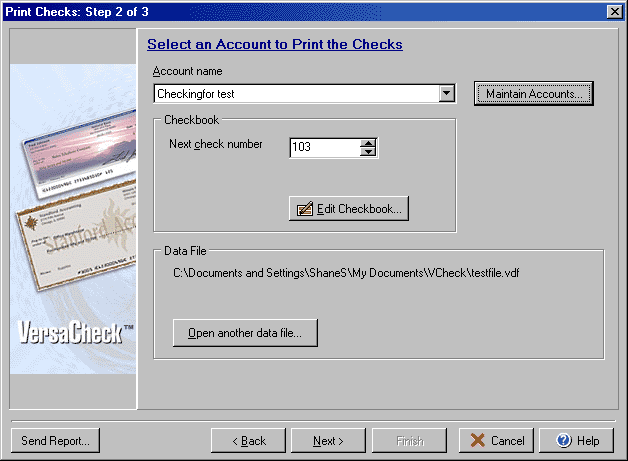
The Print Checks window for VersaCheck Active Check Server printing in conjunction with
Quicken, QuickBooks or Money allows you to edit the account used or to edit
the checkbook before printing.

The Print Checks Step 2 of 3 window opens when using the VersaCheck Active Check Server printing from Quicken, QuickBooks or Money. Select the account from which the check will be drawn in the Account name drop down list. Make sure that the Next check number field displays the same check number (or starting check number if more than one check is being printed) that shows in your accounting software. If you need to edit the checkbook to change bank information, etc. click the Edit Checkbook button. Click Next to to bring up the Print dialog box.
The Data File area of the dialog box allows you to view which data source (vdf) file VersaCheck is currently using. If you wish to switch to another data file you can click the Open another data file button to load a different data file (for example with accounts for your personal records instead of business records, or for a second business.) You can also use the Maintain Accounts button to open the My Accounts screen where you can create or edit the accounts that appear in the Account name drop down menu.
If you encounter a program error in printing the check, you may click the Send Report button to attach a copy of the print data file to an email and submit it to G7 Productivity Systems for review/troubleshooting.
*IMPORTANT: When printing Standard or Wallet checks (which contain 3 checks per sheet) Money and Quicken both allow options to print a different number of checks on the first page. When using the Active Check Server to print from within Money, make sure that the option for 3 checks is selected (the 1 and 2 check option layouts are not supported). If printing from Quicken, make sure to select either 2 or 3 checks for the first page.